Tuesday, April 30, 2013

Whimsical Wallpaper

Over all of our years of trial and error DIYing and projects, one thing we have never tried before is wallpapering.  I remember when we were first married we were given some advice-- something about how the worst thing you could possibly do during your first year of marriage was try to wallpaper a bathroom!  The mess, the precision needed and the permanence of your mistakes definitely would call for great teamwork-- and a sense of humor.

One reason we haven't ever tackled this project before is the cost-- wallpaper is ExPenSive.  So if you're not staying in your house long (like when we were in seminary) or if you're renting (like our years in Europe), it just doesn't make sense to invest in rolls and rolls of the precious stuff.  BUT, now that we're settled into our happy new lives in Louisville, I think we could justify it (right? :)).  


I'm not sure we'll be up for this semi-intimidating project anytime soon (we have a deck to build before that happens!), but it's fun to think about.  And wallpapering doesn't have to break the bank too badly, since small rooms, little hallways and bathrooms all look fabulous with pattern.  (Check out a post I did back in Vienna on wallpaper in small doses here.)

When I was a child I used to love any wallpaper or print with a sense of whimsy, and I still do-- something you can lose yourself in, that captures your imagination.  Why not have a little fun with it? Especially if it's going to be on your walls for a long time.

Mel & Liza

Amy Lau Design

Angela Gutekunst Interiors

Houzz

Diane Bergeron Interiors

Martha O'Hara Interiors

House of Ruby Interior Design


Birdcage by Thibaut

Shantung Silhouette by Schumacher 


Deer Damask in Duck Egg Blue


Have you ever tried to wallpaper before?

xo

Liza

Monday, April 29, 2013

Urban Gardening in Gramercy Park

Last week we began planting the roof top garden. I chose to go with boxwood, perenials, climbing ivy, and azaleas. I think it turned out quite nice.


Thursday, April 25, 2013

Be our Guest: Nurse Luna


Since the start of our blog, I have been hoping my sister would give us a little post on health products. Marissa is an RN and all around fun person to be around. So, when she agreed to share what she is up to and how we can be healthier, I was so pleased and am happy to share her wisdom.

Wednesday, April 24, 2013

Dresser Makeover

I only have a minute to write a quick update post for you today, since my Mom is in town and of course I want to spend as much time as possible with her.  It's so fun to have her here with us!  


Before she arrived I worked some more on the little guest room to help bring it along a bit more and hopefully make it more comfortable (and less like the workshop it has been all this time).  Remember the free dresser we found in the garage when we bought the house?  In order to spruce it up a bit I bought some brass hardware from eBay and switched out the old wooden knobs.


Thankfully the center of the brass pulls is big enough to cover the large holes left over from the wooden knobs, so I didn't have to worry about filling in with wood putty or sanding (I avoid sanding at all costs!).  After removing the old knobs I measured carefully, both horizontally and vertically, and marked where the new holes should go.  


Often I find that when drilling holes, getting the drill bit started in exactly the right place can be a real challenge.  Especially when it's a wider drill bit, it has a tendency to slide all over the place, making it difficult to be accurate with the placement.  One little trick I have learned that's helpful when you really need to be exact (like with hardware installation) is to place a nail or screw exactly on your mark and tap it into the wood slightly with a hammer.  This leaves just enough of an indentation to allow your drill bit to grab a hold of the wood, and you end up with holes just where you need them to be.


I love the look of old antique chests with original brass handles and escutcheons, or key holes, so when I saw these guys for sale on eBay, too, I decided to give attaching one of my own a try. 


Clearly I still have some work to do (just ignore the pile of tools crammed into the corner there!), but at least I'm enjoying how this chest of drawers looks all dressed up.

xo

Liza

Tuesday, April 23, 2013

Simple Decor on a Budget (Mockingbird Conference)


Like Liza said, we just returned from the Mockingbird Conference, and what a weekend! We heard from Mary Karr, Sally Lloyd Jones, and many more. If you are interested you can just go to HERE, to listen to the recordings. My responsibility for the conference this year was to organize meals and dinner settings, YEAH!!!! When I was thinking about how to decorate a space that is a mix between medieval dungeon and modern, I quickly thought to go simple.  My other challenge was to create a space that was welcoming for 250 people, feed them well, and AVOID at all costs the feel of a cafeteria. 


MY MATERIALS
burlap
white linen table cloths
votive candles
twine
variety of mason jars
flowers
(dogwood, wax flowers, lilac, rananculas, camilias)


Reunited

We just returned home on Saturday night from a wonderful trip to NYC for the Mockingbird conference (a fabulous organization--check out their website here), which is always a reunion with old friends and a happy blur of great conversation.  Whenever we make a trip to New York we try to squeeze in as much time as possible hanging out with Mel and her husband, Jacob, who are our dearest friends and so much fun to spend time with.  I'm already looking forward to my next trip in June, when Mel & I will be attending the Alt conference together!


xo

Liza


Thursday, April 18, 2013

Spring Planters


Now that spring has finally arrived, we are so excited about getting outside and enjoying a little yard work!  I have been keeping an eye out for planters and was thrilled when I stumbled on this big guy at Home Goods the other day.

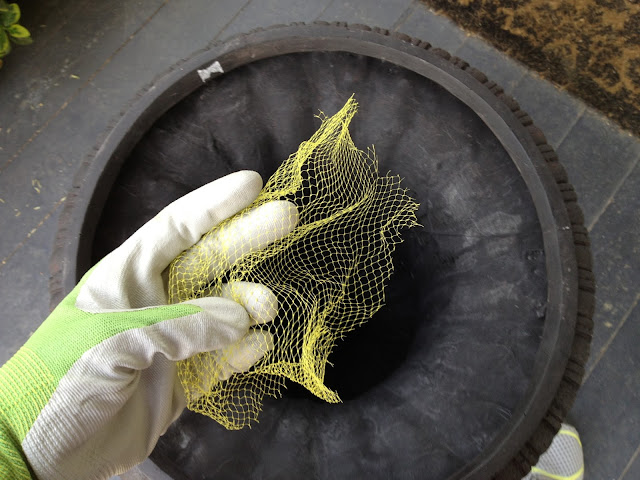
Before filling the planter with soil I needed to add a drainage hole to prevent root rot.  Using a big round drill bit I just drilled a hole in the center of the bottom and then covered the hole with some plastic netting (the kind onions come wrapped in) to keep the soil from dropping out.  Since the roots of these plants won't need to reach all the way to the very base of the planter, I filled the first few inches in with packing peanuts 1) to help further with drainage, and 2) to keep the pot from getting to heavy.  


On my way home I stopped off at a local plant shop to pick up some flowers to brighten up the front of our house, making sure to get a variety of color, size and texture.  


Happy spring!

xo

Liza
Related Posts Plugin for WordPress, Blogger...