Sophia and I have been crafting up some fun valentines this year. Since I LOVE flowers so much, I wanted to teach her how to make paper flowers for her classmates.
I say when it comes to projects and children, the process should be fun. So, since I knew there is a deadline for Valentine's Day, I have been working on this project with Miss S. for a couple of weeks. We pick up one step at a time. I don't want to overwhelm her or end up making 22 Valentines all by myself.
FIRST, we picked some fun images from Paper Presentation to cut and paste into cards. I did the cutting then I had Miss. Sophia paste them onto bright colored paper.
Now, Sophia is able to write letters. This is new for her, and naturally she was tired of writing after a few. That is when we would return to our pasting. Projects with children should be age appropriate so they feel they have accomplished something well.
Now, on to the flowers.
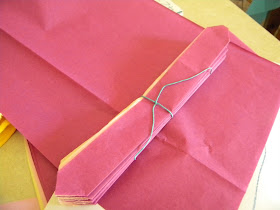
I love making paper flowers-- they are so festive and add the right POP of color. You can pick any color of tissue you like and layer away. Just start by accordion folding twenty layers of tissue. You want to end up with a fan of tissue. Simply tie a string or ribbon around the middle of the fold. Lastly, gently pull each layer towards you on both sides and fluff the flowers out.
 |
| My little helpers! |
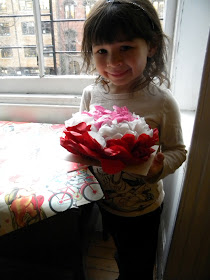
Paper flowering is a fantastic project to share. Obviously, you fold the tissue and tie, then you have your little one pull the tissue apart. Sophia pulled and fluffed.
Like I said this is the type of project where prepping is key before including your little helpers. There is nothing LESS fun than working on a project that ought to be enjoyed and then ending up frustrated with the entire process. I promise this project is easy, fun, and totally satisfying. Your parties will never be the same after you have mastered THE PAPER FLOWER.
Happy Valentining!!!
M


Cute project! We will have to try that!
ReplyDeleteThe girls will LOVE it!!!
ReplyDelete