Friday, May 31, 2013

The Look for Less

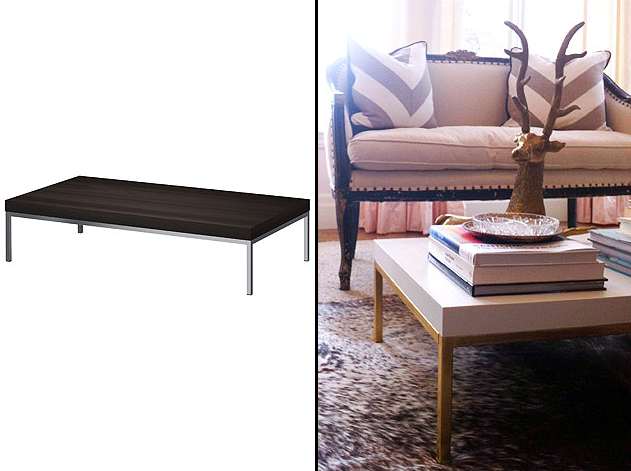
You may remember, I have a certified obsession with gold coffee tables. I just love that touch of shine, glamor and warmth at the center of a living room that a little pop of gold brings.  Unfortunately, so many of the beautiful tables I would love to snatch up are waaaay out of my price range, so I love the idea of upgrading a simple coffee table with a metal base into something special.

Jordan on her blog, Oh Happy Day, transformed her living room by painting the metal base of her IKEA KLUBBO coffee table gold.


Here's another before and after example of an IKEA KLUBBO coffee table upgraded with gold leaf for a boost of glamor.


Spray painting coffee table or side tables yourself gives you the option to choose what shape you like without worrying too much about the finish (since you'll be changing that anyway).  For instance, I love the look of two smaller tables positioned together to create the feel of a traditional coffee table, and two of these square tables from Overstock would be perfect.


Or this set of nesting tables from IKEA-- the whole thing is only $60!


And speaking of spray painting things, check out how blogger Ashley Muir Bruhn used Rustoleum's metallic spray paint in brass to take her IKEA office chair from basic to fabulous!  I love this idea.


xo

Liza

Wednesday, May 29, 2013

Make it count....

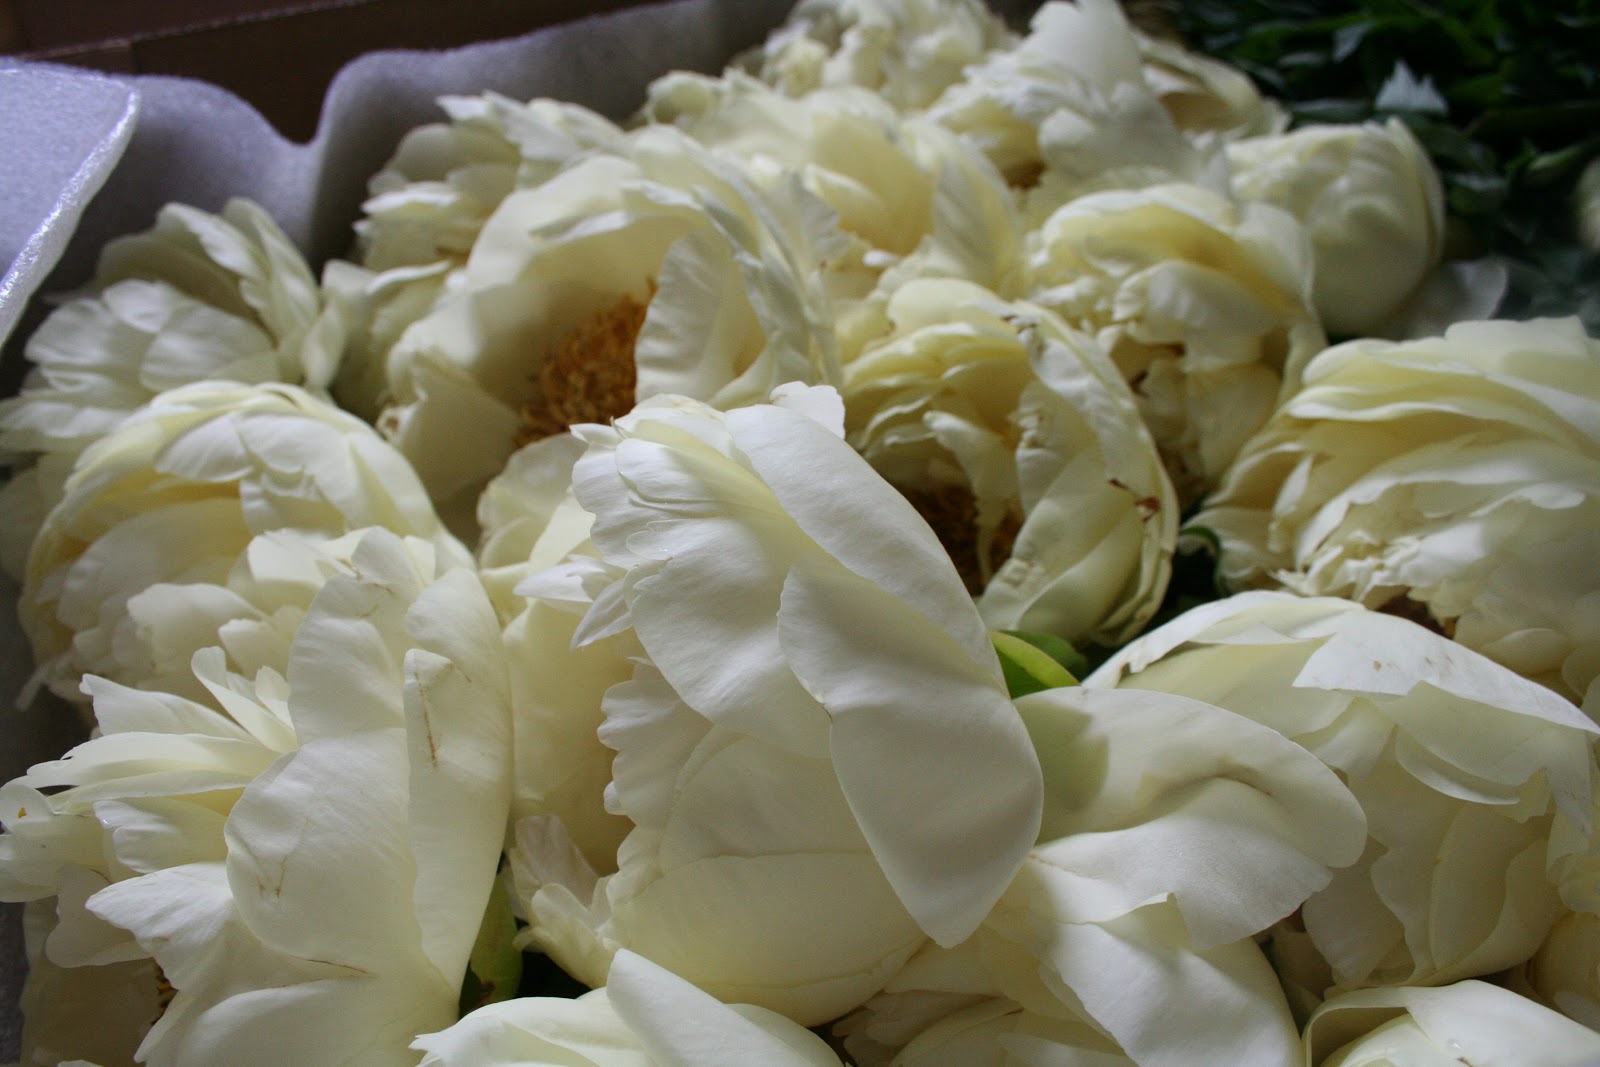
Today I was helping a friend with a cocktail party. Sadly, I forgot my camera but had my i phone along with me. Here are a few behind the scene photos. Now, just a tip, when you are planning arrangements for any event you want to make each bloom count. If you don't arrange with a bit of simple math your floral composition can be off. For today, I went for elegant romance, since the party is  going to be held in a historic space. The arrangements will be alongside silver platers, silver candle sticks, and the space oozes elegance. 

When I am planning an arrangement I hope something that pops and is unexpected. I chose to use these beautiful peonies, and they are all pop. When planning remember to think how many blooms you need for each arrangement. In this case I used two per arrangement. Keeping arrangements slightly calculated will help you get to the composition you hope to achieve.  I also love to include a flower that is rare, like a Scabiosa. I don't about you, but when I see an arrangement I am always looking for the unexpected.  


Mil Besos,


Mel

Tuesday, May 28, 2013

Project Planning

As always around here, I have a few projects on my mind that I'm mulling over until I have the time to tackle them.  

One: the entire second floor is missing the shoe molding which transitions the base molding down to the floorboards and covers any gaps (which we have plenty of in this old house!).  Now that we have finished ripping out all of the old beige carpet and painting the floors, it's time to finish off the look with some quarter round or shoe molding.

Here's what it should look like:


And here's what we're dealing with:


And the best part is, this is a project for our pneumatic finish nailer:)

Two:  Now that we have a somewhat tidy bedroom (thanks to our new extra storage space under the bed!), I am thinking I might try to emulate Jenny from LGN with her great DIY pelmet project.  How cute are these window treatments?  And she makes it look so easy...


Stay tuned for some before and afters!

xo

Liza

Monday, May 27, 2013

Memorial Day Sales...

Today is the day to hit up large home items you have been longing for, because most of your favorite stores are having great sales. A favorite shop of our is Gramercy Furniture Store in Gramercy Park. They usually have wonderful furniture pieces and rugs from the neighborhood. I love most pieces with history. While I was strolling along, I popped in to find their antique rugs at 50% off!!! Happy day for me, and the kids are pretty pleased too, since this is the perfect rug for summersaults. Check out your favorite spots before the day's end and see what fabulous pieces you find.


Happy Memorial Day!!!

Mel

Friday, May 24, 2013

Balloon Crush


These ballons make me so happy!  I might have to order some before we throw our next birthday party... Even for adults, who wouldn't want a big bunch of these in their honor?


Happy Friday!

Liza

Thursday, May 23, 2013

Modern meets Garden

Last week's wedding was so much fun, I wanted to share some fun photos of behind the scene pics. When I was approaching this wedding, I went for a free flow garden look inside modern containers. The pop of pink against the gray boxes did the trick.

What do you think?


Wednesday, May 22, 2013

Partying it Up in Style--on a Budget


This past weekend our dear friend, Dorsey, celebrated her graduation and the significant accomplishment of completing her graduate degree.   Happily, she and her husband hosted a party together with another fun graduate friend, and I was thrilled to be enlisted to help with the flowers.  

Because this wasn't a seated dinner party with lots of tables, I only needed a few arrangements-- which meant I wanted to make them count!  I decided to create one pretty large one for the dining room table (the first thing anyone sees as they walk in), one smaller one for the bar and something bright and fun for outside.  

As soon as we moved here I started keeping an eye out at every grocery store and flower shop to get an idea of price and selection. (Trader Joe's, for instance, often has bunches of fresh eucalyptus that can be hard to find-- and I love the smell!)  So for this project, I headed to two of my local grocery stores that I know often have good deals, and I worked around what they had available, choosing lilies, tulips and hydrangeas as my focal points with others for filler.  I always try to go with a variety of color, bloom size and shape to keep things visually interesting. 

For a large or more formal arrangement like this I always use an oasis (or in this case two), which helps keep the flowers both watered and anchored in place.  First I cut the dry oases with a sharp knife to fit my bowl and then soaked them for a few minutes in cool water until saturated.  Normally I like to have the oasis stick up over the top of my bowl, which makes arranging easier and the finished product more natural looking, so in this case I layered flat boards of styrofoam underneath to raise everything up.


For the outside table I wanted something bright and fun-- and also easy-- so I bought two six packs of hot pink petunias, stuck them in a wire basket and filled in the outside with Spanish moss for softness (and to hide the plastic containers).  This is my new favorite super-fast centerpiece!  


I had to get creative when transporting the arrangements:)


For tablecloths I was excited to use Mel's amazing look of white linens and burlap that I loved at the Mockingbird conference a few weeks ago.  One small problem I encountered was that I don't own enough white tablecloths in the right sizes for Dorsey's three buffet and bar tables.  So instead I brought over a couple of white twin bedsheets and folded them to fit.  Since they're almost completely covered in burlap anyway, you couldn't even tell!  So sheets make a great tablecloth substitute in a pinch.

After comparison shopping between craft stores, I found this pretty sage green burlap at JoAnn's, which I loved so much I went ahead and bought the whole bolt-- 20 yards worth!  I knew I would want to use this look again for parties in the future...


Happy arranging!

Liza

Tuesday, May 21, 2013

Sick Flowers

Last week we had a wedding, Jake married the couple, and I set up the flowers. The flowers in their natural state were incredible. Come back Tuesday to see how we used these special blooms.


Monday, May 20, 2013

Sewing a Box Pleated Bedskirt


As we have been working on clearing out our middle room upstairs, it has again become clear that we need to come up with some new ways of finding extra storage space.  With no accesible attic space and only a tiny cellar, storing off season clothes and less used items  poses a bit of a challenge-- and up to this point we have just been stacking unsightly plastic bins in corners all over the upstairs.  

We decided our best option would be to raise up our bed and pack every square inch underneath with boxes.  I picked up these plastic risers from Walmart, which give us an extra six inches of height and another layer of under bed storage bins.  Functional, for sure, but without an extra long bedskirt to hide our new system, our bedroom was feeling a bit too much like a college dorm.


I happened to find a bolt of sale fabric a while back that would work in our room, a soft green, knobby weave, so I started googling instructions on how to sew your own bedskirt.  To be sure I wouldn't be short on material, I looked up how much fabric I would need using J&O's yardage chart:


As the base for the bedskirt I used an old fitted sheet around the box springs.  Then I measured the height of the drop, the length and width of the mattress and calculated the extra fabric for each pleat. After researching several other DIYers, I ended up using this description of how to measure and sew, modified slightly.  


These are the best under bed storage boxes I have found, by the way, since the dimensions are just right for fitting the maximum amount under a queen sized bed-- and they also make them for twin/king beds.  


Thankfully now you can no longer see that we have eight of these guys stored under there!  


Happy Monday!

Liza
Related Posts Plugin for WordPress, Blogger...