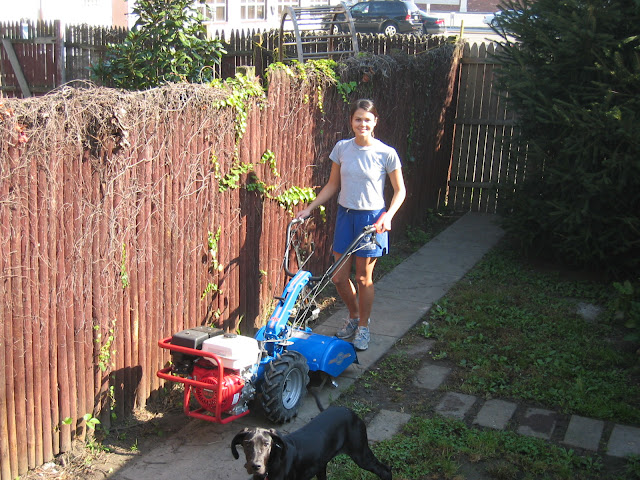
When we moved into our house in Ambridge, PA during our first year in seminary, I was so thrilled to have a yard. Never mind that this yard was really just a tiny piece of land in the back with struggling patches of grass and charmless concrete walkway, all overshadowed by the view of the CVS a block away.
Not to be deterred by a little challenge, Jady and I kept this kind of little garden (below) in mind as we planned our own back yard makeover.
Our first thought was to rejuvenate the "lawn," so we rented an aerator from our hardware store and tore everything up to kill the weeds and encourage soil drainage. Then we spread grass seed and waited...
We realized once the grass began growing that the soil quality (or lack thereof) and the size of the yard meant that our little patch of grass would always be a challenge to maintain, so we changed our plan. Flexibility is critical when doing it yourself! Rather than a yard, we decided to go for a patio look and pave everything except for the surrounding flower beds. The perfect solution for our sad grass patch-- and a patio would provide us extra entertaining space. Win-win.
I sketched out an idea for how to pave it all, deciding in the end on a brick walkway cutting through to the back alley and a stone patio area off of the back steps.
Our first step was to tear out the ugly concrete walkway running down the side of the house out to the back. Then, using steaks and twine, I mapped out the lines of the brick walkway as a guide.
The lovely view of the CVS again.
Next we dug out the soil a few inches down where the bricks would go to create a smooth surface once the walkway was paved.
Our goal with the back yard was to create a little private garden space in a town where neighbors live nearly on top of each other and you always feel a bit exposed. To help give us a secluded feeling, we decided to install our own fencing. We bought a simple tool for digging post holes (Jady said is was a great workout!) and got to work, cementing the posts in place before attaching the fencing. To add even more height we attached latticework to the top, creating our own custom privacy fence around the yard.
With the fence and walkway in place, we turned next to the patio. Again we staked out the area with string, dug a few inches down and smoothed the surface as well as possible to provide a flat surface for the stones.
Then we laid out landscape fabric all across the area to surpress weeds, followed by two inches of sand.
Next we started laying down the stones, fitting them together without any pattern to give it a natural, relaxed look. Here's a photo from halfway through, with a tarp covering the unfinished area.
Nearly finished! Once all of the stone was laid, we brushed dry cement into the cracks and hosed the area down to secure the stones in place.
After filling the beds with compost to boost the quality of the soil, we mostly choose plants that would be low maintenance to fill out the garden. A mixture of flowering, deciduous and evergreen plants provided a dynamic mixture of textures, flowers in the summer and some green and structure still during the bleak winter months. Finally, we chose some fast-growing vines to help soften the space from the newness of the fence.
Now a more private scene instead of the view of the CVS.
Even the tiniest, saddest yard can be transformed into a little private getaway and outdoor dining room. I hope you're inspired to get your hands dirty:)
xo
Liza


WOW! I am super impressed Liza...not motivated enough(I have to have a gun to my head for that! ha!) to get my hands dirty but to hire you as my interior designer and landscape artist - when we get a house (whenever that is!). :-) Luv, JPotter
ReplyDeleteThat was really fun! And I just remembered that we have the church bird house in storage!---
ReplyDeleteOMG. You guys are amazing. I really can't believe you pulled that off... I remember visiting you all while it was in process, but I don't think I ever got to see the finished product. Incredible! Look for it on AT next week!
ReplyDeleteYou are so impressive! What an amazing transformation!
ReplyDeleteWonderful, wonderful. Sweat equity shows, every "dollar" of it. It's charming!
ReplyDeleteThis is Fantastic, I was following links from re-nest when I found your blog. I am living in Ambridge now and going thru the same process. Sitting in back yard today having second thoughts about this process. Then found that it has been done beore and can be done again. God is soooo good. I live on Park Road.
ReplyDeleteI'm so glad you found the post encouraging! Living in Ambridge takes exactly the great perspective that you have-- maybe you'll end up loving your time there, like we did.
DeleteThis comment has been removed by the author.
ReplyDeleteThis comment has been removed by the author.
ReplyDeleteWhat dry cement did you use?
ReplyDeleteOutstanding! :) Talking about one heck of a good job! Two thumbs up for that garden!
ReplyDeleteThanks for one marvelous posting! I enjoyed reading it; you are a great author.I will make sure to bookmark your blog and may come back someday. I want to encourage that you continue your great posts, have a nice weekend!
ReplyDeleteI love your posts as its easy to since you share lots of information, thank you
ReplyDeleteYour yard looks so awesome! Good job.
ReplyDeleteHi can you advice I done trellis for height but it higher than concrete posts got gaps but all different sizes
ReplyDeleteThis is resembling a discerning and facilitative post. You ’ve carried some expert attendant then.
ReplyDelete