Showing posts with label organization. Show all posts

Wednesday, November 5, 2014

Garage Chic: Cheap Shelving DIY


At the back of our first floor we have a small extra room that can technically be counted as a bedroom, since it has a small closet and a bathroom nearby.  We don't really have much need for another bedroom at the moment, and honestly it's too small and awkward to lend itself to that use on a daily basis.  Until recently it was a catch all space for my painting supplies, wrapping paraphernalia, and even a few boxes that I just couldn't find the energy to unpack (yes, from two years ago!).  

Thankfully I knew once the rest of the house had been pretty much finished I would inevitably feel a surge of motivation to tackle this random little room and turn it into an office and painting studio area.  The first step was clearing out whatever junk had accumulated over time from laziness, and then I realized exactly what we needed: storage.  My painted gray desk from our Vienna days helps organize quite a bit of office materials, but it wasn't enough.  Not wanting to spend a bunch on mediocre bookshelves for this room, and also not interested in a two hour drive to IKEA this time, I decided to stop by our local Habitat for Humanity ReStore center, which sells a huge range of second hand home items.  This place offers a treasure hunt, with plenty of junk to rummage through but also the possibility of finding a cool light fixture, old french doors, a fireplace mantel (like I did here), or in this case, a shelving unit.


These basic metal shelving units you'd see lining the walls of a garage or basement seemed more interesting to me than a basic wooden bookshelf, so I brought home the largest one-- for 10 bucks.  


The whole thing was pretty grimy, and some sections of the shelves and the side rails had been rusted over time, so first off I used dish soap and water to scrub each piece well to remove any residue or dust.  I decided to spray paint it, and it's always hard for me to make myself do the cleaning/prep step in this process, but it's important!  So I waited (im)patiently while all of the pieces dried before beginning to paint.


Normal spray paint is wonderful at covering a multitude of problems, but with this much rust, I decided to bring in the big guns.  Rustoleum makes a special primer for rusted metal that seals in the problem and protects from further corrosion.  So all of the rails and shelves got a good coat of primer first.


I wanted to play with a more formal look as a foil for the industrial nature of the shelves, so I settled on a black and gold color scheme.  For the shelves I used a basic Rustoleum black matte spray paint, and for the rails I decided to go metallic with Krylon's "18k Gold Plate." 


Once everything was dry to the touch I tried to remember how to reassemble everything (the before photos I took were key here!), and I'm happy with the result.  I now finally have a place for our stationary and my oversized painting supplies, and our printer is no longer on the floor!  

The whole project took me a couple of days since I spread out all the steps, but you could definitely finish it all in one day, including dry time.  With all the spray paint I used up, my total came to about $35, including the original $10 for the shelves-- a pretty good deal!  And if we ever don't need them in the house, they can always glam up the garage a little:)


xo

Liza

Monday, July 14, 2014

Closet Inspiration

I have been out of commission for a while now, and I'm so excited to be back on Mel & Liza again!!  Here's a quick update on what I've been up to lately.  A couple of weeks ago, Jady and I joined (most of) his family down in sunny Florida for long overdue vacation involving eating, sleeping and sitting on the beach all day long.  It was wonderful, and I even read a couple of actual books, which I'm ashamed to admit doesn't happen very often at home these days.  White sand, suntans, seafood, riding bikes everywhere- it was fabulous.

Just after arriving home again, I went straight into the hospital to have sinus surgery, which I've known I needed for a while now but have been putting off (who has time to lie around recovering for weeks at a time??).  Thankfully the whole process was much less traumatic than I had heard or imagined, and I'm actually starting to feel like myself again! 

During my first few days of lying in bed, in between naps I couldn't help but daydream about what else we could do to this house (IF we had the money, and IF it made sense with the real estate market, and IF we stay here for 5 years-- you get the idea).  So, like I said, daydreaming.  But IF... then I'd want to build a second story onto the back of the house above the back rooms, which is just one floor at the moment.  That addition would 1) make our bedroom spacious enough to be a real master, and 2) give us an enormous walk in closet.  Yes, please.

I think part of my daydreaming exercise was brought on by the fact that, between packing, unpacking, and me being bedridden, our own tiny walk in looks like a grenade went off in there at the moment.  Even when it's tidy, our clothes are smushed together and crammed in so tightly there's not really room to scoot anything side-to-side.  So every now and then I like to imagine what it would be like to have one of these amazing setups...


Tuesday, December 17, 2013

Organization Inspiration: the Garage

Now that Jady, the dog and I have settled back into life in a house, sometimes I forget that we lived for so many years in an apartment. There have been some great benefits to having more space, for sure-- more than one bathroom, a bedroom just for guests-- and I'm still enjoying the luxury of just opening the back door and letting the dog outside. Hey, it's the little things:)

But how is it that after years of paring down our stuff and keeping things (fairly) simple and organized, I already feel like this house is bursting at the seams?  Between the mountains of things we kept in storage at home while we were in Europe (apparently we were hoarders-- seriously, we kept everything!), some additions from our time abroad, and then the normal, daily accumulation of life, sometimes I feel like one of those fish that just keeps growing according to the size pond it lives in.

Slowly and surely I have been tackling the organizational challenges of closets I crammed random boxes into when we first moved in and were working on the house (how long exactly can I claim that we "just moved in"??), and we've been making some satisfying progress.  One area that needs some serious organization still is our garage, which has functioned as a storage unit, lawn care center, power tool workshop, and workout room (that last one's more hypothetical).

Here's the garage at the height of its messy glory:


When I step back and really take in what we've got in there, it's actually not that bad.  The problem is that we have no storage, no shelves or cabinets to help separate the paint cans and power tools from the extra furniture and the treadmill.  For now, I'm dreaming of a garage like one of these:

Good Housekeeping


Hey, a girl can dream, right?

xo

Liza

Tuesday, November 19, 2013

Holiday Survival

Hello Tuesday!! 
The weather is GLORIOUS here in NYC. We are just soaking up every beautiful minute of it. I do appreciate this great weather, and just the right climate can help me get much done on my long to do list. I don't know about you, but the holidays can be overwhelming, so EVERY year I have come up with a few check off items pre-Thanksgiving. 

Uno: Take Christmas photos & order Christmas cards
Dos: Make photo books for the abuelos
Tres: Plan out Christmas decor

So far we are on track. This year was especially important to stay focused because as of today are hosting 5 Christmas parties- YIKES.  I continually tell myself SI SE PUEDE!!! I am sure when this saying was made famous, Christmas parties were not at the core. 

One site I wanted to share with you all today is Prinstagram. I am OBSESSED!!!! I can not wait to receive my packages, I know they will be tough to part with, which is a sure sign of an awesome gift. Just check out their amazing look, and who doesn't love printed photos in our digital age? Last year a friend printed one photo for me and I have it hanging up like a small treasure. Needless to say, get ready for cool pics from the Smiths.


Monday, August 5, 2013

A little organization....

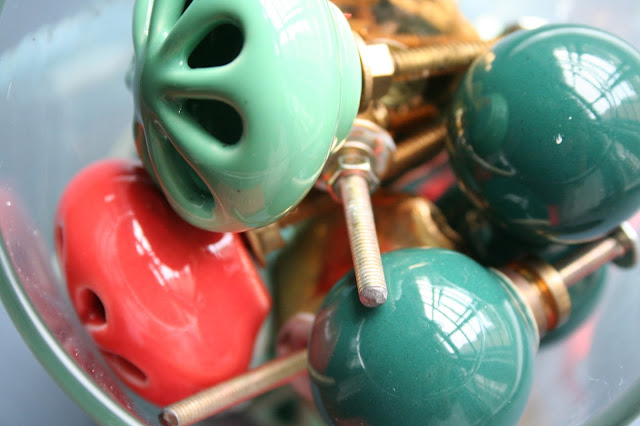
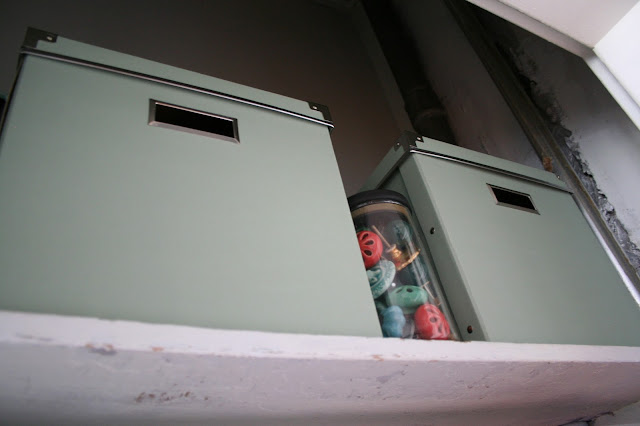
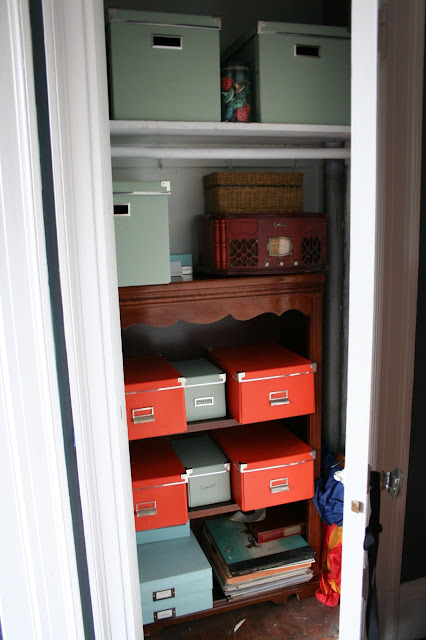
I have fallen in love with our new home, and I would have to say, the love comes from the amount of closet space we have throughout the house. You just can't have too many closets! Since our home is very old, though, the closets were not the in best shape. With a small budget we managed to patch them up and repaint most of them. In our entryway we decided to have an organized paper work closet. Left behind in the apartment was a bookshelf, and since we didn't really need more bookcases in this apartment, we decided to use it for shelving within a closet, which makes this truly our odds and ends closet. Including paper, gadgets, markers, records, extra furniture knobs, etc....
One amazing secret about IKEA is they sell filling boxes so inexpensively and in such wonderful colors too. Since we were there a few months ago a picked up a few in various sizes. I love how clean and organized they look. 


Mil Besos, 

Mel

Wednesday, July 10, 2013

Getting Organized in the Kitchen

When we first started moving a few things into the house and living in the middle of a construction zone, we made do with the bare minimum in the kitchen until the major renovations were finished.  Once the dust had settled, we brought in the boxes and shoved everything in any empty cabinet-- not exactly the best way to organize anything.  For a while we functioned with it, in a sort of every man for himself, I-think-I-saw-that-once-but-have-no-idea-where-it-is-now kind of way.  Think of every cabinet as a junk drawer, and you'll get the idea:)  Gradually I started reorganizing a few sections at a time to promote general sanity, and I pretty soon realized that for the big under counter spaces I would need a little help.

Of course my first thought was how what we really need are some of those customized cabinetry options you find in high end kitchens, with slide out spice racks and drawers for everything-- huge ones for dishes and pots, wide ones for flatware and utensils... But one of the big ways we saved money on our own kitchen renovation was to keep the cabinets we had, so starting over so I can have new drawers just ain't gonna happen.

After doing a bit of online research into organizers that you can install inside your cabinets, I ordered these heavy duty wire drawers, which fit perfectly in the space we needed.  


So now instead of a sad pile of who-knows-what, we can actually see what's in there and (gasp) get to it!  Can you tell I'm happy with these new drawers?  


xo

Liza

Tuesday, June 11, 2013

Master Bath Mirror Makeover


We are celebrating some progress around here!  Once we finished priming, painting and tiling our master bathroom months ago, I have to confess I moved on to other projects.  So much in the house was demanding my immediate attention that the moment the master bath was livable, I put off finishing it until later... much later!  One benefit to waiting was that it gave us some time to think through what we wanted for the mirror situation over the double sinks.

At first I thought we might just install a wall of mirrors, or even hang two matching ones up-- but after living with the temporary set up for a while, it became pretty clear that we could definitely use some more storage.  I hunted down some mirrored medicine cabinets with a size and price that fit and called a couple of mirror companies to come give us estimates for what we wanted.

This room really isn't very big, so in order to open it up some and take advantage of the great natural light, I still wanted to cover the whole wall in mirror.  Surrounding the two built in medicine cabinets made this a bit more of a challenge, but they made it work!    And we are loving finally having a finished bathroom:)

Here's the before: note the lovely holes in the drywall, temporary mirrors and the huge mess of products overwhelming our countertop.


And the after:


xo

Liza


Wednesday, January 16, 2013

The Sharpest Tool in the Shed

Since we moved into this house, planning our home improvement projects has been an exercise in prioritizing.  There's just no way I would get anything accomplished if I tried to tackle everything at once! (however tempting that might be:)).  We've come a long way, but there are still plenty of future projects I have to ignore consciously until we can work our way down the list.  One of these areas is our garage, which is currently the catch all for everything we don't have space for in the house at the moment.  Crammed full of everything from lawn care equipment, an old dishwasher, extra furniture, rugs, and Christmas decorations, just sorting through it all will be a challenge.  Eventually I would love to set up a work station for our tools so everything is easily accessible (unlike now, where things are scattered all over the house).  Also, the garage is totally unfinished and has zero natural light except a bit through the door.  Maybe we'll get around to insulating and adding a few windows and even a skylight?  Then we could always park a car and use the extra space for a home gym or art studio... So many fun options!


Ok, so I know it's not exactly a tool shed, but I love the way they finished this garage!  All of that light...


We definitely need some tool storage, like this one from Sears... tough and feminine.


Or this one in a fun cherry red, which will perk up any dull old garage.


This table gives you tool storage as well as a work surface for all of those projects... and the gray is lovely.


Just a little inspiration to help get organized!

xo

Liza


Tuesday, January 8, 2013

Linen Closet DIY


Upstairs in this house there is one closet on the hall that would be an obvious place to store linens, but it was only outfitted with one top shelf and a rod for hanging clothes.  In the absence of another coat closet downstairs, I suppose this spot was the default best place for jackets before.  But now that we have installed a new closet underneath the stairs (read the whole post here) on the first floor, we can put this upstairs space to better use.  

We are about to host some guests later in the month, so I decided it's time to get myself organized!  And there is nothing more satisfying than tackling a messy, chaotic closet and turning it into something functional-- somehow it makes me feel like the rest of my life is falling into place, too:).  My first step was to clear out everything that had been stashed into this closet up to this point and find a new home for it.  Then I considered my options for adding shelves and decided, in order to take advantage of the depth of the closet, to build in custom wooden ones instead of buying wire ones from the hardware store.  I like the look of the solid built ins better, too, and the whole project really didn't take long at all.

Here is a shot of the closet in the middle of the process (sorry, I forgot to take a true before photo!), where you can see the original top shelf and hanging rod.


I chose some straight 1x2 inch boards to support the shelves, measured and cut them down to fit along the back wall and on the sides.


For the shelves I chose some high grade plywood that we had left over from our built in bookcase project, which I cut down to size with a circle saw.  To be sure the supports will hold, I screwed them into the studs behind the drywall and then just positioned the shelves on top.  After a coat of primer I painted the whole inside of the closet with two coats of white semi gloss to freshen up the space.


The new storage we gained from the built ins turned out to be perfect, but I wasn't happy with the unfinished look of the two new shelves.  The edges of the plywood, despite my sanding efforts, just didn't look clean, so I picked up some 1 1/2" decorative molding to face them with, as well as some metal label holders from JoAnn's fabrics.  I printed off labels for each stack of sheets and towels to help identify what should go where, and cut them out to fit.


After nailing in the new molding, I took the extra time to fill the holes with wood filler and sand it once dry.  One more round of primer followed by two coats of white semi gloss paint, and the shelves were finished and ready for the labels to be tacked on.  I am happy with the way they turned out now, and we finally have a place for all of our sheets and towels, blankets and extra pillows.


I swear I'm not usually this organized (I don't know what got into me!), but I think with this project, even Martha Stewart would be proud:)

xo

Liza

Related Posts Plugin for WordPress, Blogger...