Showing posts with label Fabrics. Show all posts

Wednesday, October 8, 2014

Designing Jady's New Office

This summer has been one of bittersweet transition for us, as our beloved rector at church counted down to retirement and began to pass the baton to Jady.  As Robin and his wife, Mary, look forward to retirement, we're both excited about this amazing opportunity to serve in such a special church full of people we have come to love so much.

Just a few weeks ago, Robin and Mary celebrated their last Sunday, and he cleared out his office and officially passed it on to Jady-- so we're on our own now with BIG shoes to fill!

Not only is the rector's office symbolically significant for Jady to move into, it's the only space in the whole place with a shot at holding the man's absurd number of books!  His current office looks like a crazy book hoarder lives in there, and I even have a few boxes of them waiting at the house ready to be dropped off the moment the painters are finished.


I love Robin's office space, and to renovate we don't really have to do much to spruce it up.  The old can lighting was pretty low, so we're replacing those with more LED recessed lights overhead, dimmable for versatility.  We're also adding library lights to the tops of all of the built in bookshelves and tearing out the corner closet that was never used to make room for more book storage (it's never enough).  Then the painters will coat the trim in white, the walls in a pale green and the doors in a soft black.


Here's what we're thinking at the moment for decor.  Jady wants a soothing wall color, a mix of traditional and quirky elements, and some pops of more saturated color punctuating the space.  In addition to the seating area (we're using the current sofa, side tables and pair of black leather arm chairs), he'll have a reading corner with a wingback chair and standing lamp, so he can take advantage of all of those books.


I can't wait to show you the progress!
Stay tuned...

xo

Liza


Wednesday, September 10, 2014

Seasonal Blooms

September is upon us and that means foliage branches, Dahlias, and scabiosas are available. Since, returning from vaca I have not had a chance to head to the market, that is until yesterday…… 

Here is what I found.


Besos,


Mel


Tuesday, April 1, 2014

Risky Business: Going Bold with Upholstery

Over the past year and a half, we have spent countless hours and tons of elbow grease making this house our own, and we truly love it here.  Part of settling into any new space is tweaking or creating your style of decor by choosing, buying or redoing furniture, art, colors and accessories in your home.  Our decorating style has always been constrained by a pretty tight budget, which I think can lead to some pretty creative solutions involving eBay, Craigslist, hand-me-downs and Goodwill stores.  Keeping costs down usually means working with what we already have or what I can manage to dig up for a deal at a second hand source.  

Partly because I know how much work it takes to reupholster furniture now, and how expensive it can be to pay a professional to recover larger items, we have stayed pretty neutral when it comes to our furniture choices.  Sticking with simple, neutral fabrics, especially on larger chairs and sofas, gives you lots of flexibility for changing up your style and color scheme over the years by switching out less expensive accessories and paint colors.  Whether you're in the mood for an all beige look or you're going through a wilder phase, you can pull off most any style working around neutral furniture, so it's a smart choice.


House Beautiful

More after the jump!


Wednesday, March 12, 2014

The Parisian Dream

I have just returned from Paris and could not be more in love with a city. I was only there for just a brief weekend, but am sure it was love at first sight. 

"Paris is a seminar, a post-graduate, a course in everything."
-James Thurber 1918


When I am traveling to a new city I have two goals in mind, GO LOCAL & BE A TOURIST. When my dear friend Jane offered me a chance of a lifetime (a weekend getaway in Paris), I knew right away there were two things I wanted to hit: the Paris Fleas (local) & The Louvre (tourist). 


FIND OUT WHAT I DISCOVERED.......

At the top of our agenda was to hit the Fleas, Paris' most famous flea market, on Saturday morning. Thankfully Jane is a fabulous travel companion and had already mapped out our destination, MARCHE BIRON. 


I say, if you want to know the locals of any city head to the local flea market. There you will discover their past and culture treasures. Paris' version offered us vintage fabrics, clothing, furniture, and jewelry. I was so impressed and was wishing I had the entire weekend to shop this place. 


 Jane discovered some new vintage fabrics for here little ones.


 For the love of chairs, there were so many to choose from. I was wishing I could just throw a few in my suitcase.


 ODDS & ENDS
I love finding quirky, cultural buys, too. I bought a few things in this stall and thought to myself, this is so Brooklyn. 


LIGHTING & REFLECTIONS
The French know how to guild ANYTHING, especially mirrors. I loved window shopping and taking photos for inspiration. 


I don't know much about the history of lighting, but what I do know is I have been mistaken to think that Americans have the market on vintage industrial lighting. Restoration Hardware, eat your heart out. Could you just die? And that wall paper?!!!!


DON'T FORGET TO EAT
My goal in terms of food was to partake in as many parisian sandwiches, pastries, and cafe creme.  I also didn't want Jane to pass out, since she is pregnant. So, we were sure to stop for crepes and any other tasty delights along the way. 


Mil Besos, 

M

Tuesday, February 25, 2014

Contrast Piping


Ever since I first saw a picture of it a while back I have been obsessed with this chair from CB2.  That color combination!  The lines! Tragically they discontinued this particular color, but it is still available in some darker, more neutral options.  Sigh.  This chair got me thinking about using contrast piping, or welting, in my next upholstery project, and suddenly I'm seeing inspiration everywhere.


Welting in a dramatically different color from the upholstery highlights the outlines of the piece, so you want to be sure you choose your chair or sofa (or ottoman) carefully for this look.  If you don't like the shape of the furniture now, you definitely won't like it outlined in such a dramatic way.

I really like the simplicity of this glider, the stark contrast of the black and white and its petite, simple lines.  


This sofa from Dorya Interiors makes white upholstery pop with midnight blue accents.


This pretty chair with light gray piping and a clean white slipcover offer more of a subtle contrast.


Clean, handsome navy with white piping.


Jenny from LGN had her Baker sofa reupholstered in a gorgeous green velvet with contrast welting.  What a fun, bold choice!


For an overall neutral look with a surprise pop of color I love this gray with neon yellow piping, which make such a fresh combination.


So fresh: crisp lime green and white.


Graphic black welting toughens up pretty blush.


xo

Liza


Thursday, February 20, 2014

Bedroom Glam

Over the years I have found that our own bedroom is one of the last places I seem to get around to when it comes to decorating.  Even though we spend plenty of time in there, and I love the idea of our room being a peaceful, thoughtfully appointed space, it always seems to trail behind so many other pressing projects.


In this house we have slowly but surely begun to make some progress toward our bedroom being more than just functional (I had to remind myself: dorm room chic is not a real thing).  Remember when it looked like this?  Not exactly depressing, but also definitely not the kind of room that makes you happy to be in it.


As we have settled into the rest of the house, I started working on a few major improvements in our bedroom, including sewing a custom bedskirt and tweaking a basic IKEA dresser to make it something special.  Lately I have been on the lookout for a mirror for over my tall dresser, ideally something gilded and a little feminine.  Since it will be the first thing you see from the hallway I wanted a mirror that makes a bit of a statement-- I wanted to love it.

After a few weeks of occasional browsing at my favorite nearby consignment and second hand shops hadn't turned up anything promising, I decided to drive a bit farther out of town to one of the larger antique malls with tons of booths and a wide range of quality and prices.  I love rummaging through places like this and the thrill of finding a gem in the middle of a warehouse full of... let's just say non-gems:)  That's when I came across this mirror, which was happily on sale down from its formerly reasonable price.  Once a quick measurement confirmed that it would just barely fit the space I needed (this guy is big), I paid my $50(!) and rushed home to see how it would look in the room.


Around the same time I happened to pass a Tuesday Morning and decided to stop in.  Our guest room happily has seen a lot of visitors recently, and we needed another set of sheets for the laundry rotation--and gosh, did Tuesday Morning deliver!  I will always love Home Goods, but the deals I found on gorgeous, high thread count sheet sets that day at TM blew Home Goods away.  Just a little side tip for you there, if you're in the market!

Of course I made sure to check out the clearance section while I was in there, and I came across these simple white and gold window panels.  I liked the look, but what really caught my eye was the fact that they're not polyester like so many silky curtains out there, but 100% real silk!  And miraculously there were four panels left in the clearance pile (exactly what I needed!), marked down to-- I'm not kidding here-- $12 each.  Yes, please.


Between the gold mirror and new silk curtains, in one week our bedroom got a serious boost in glamour, and now I love being in there.  And the $100 budget makes me pretty happy, too.


xo

Liza

Wednesday, October 16, 2013

DIY Pelmets

For a long time now I have been planning on installing some kind of window treatment in the kitchen, where the one big window we have has been looking pretty bare.  Hoping to do something simple and cost effective, I remembered Jenny's post a while back about DIY pelmets and decided to try it myself.


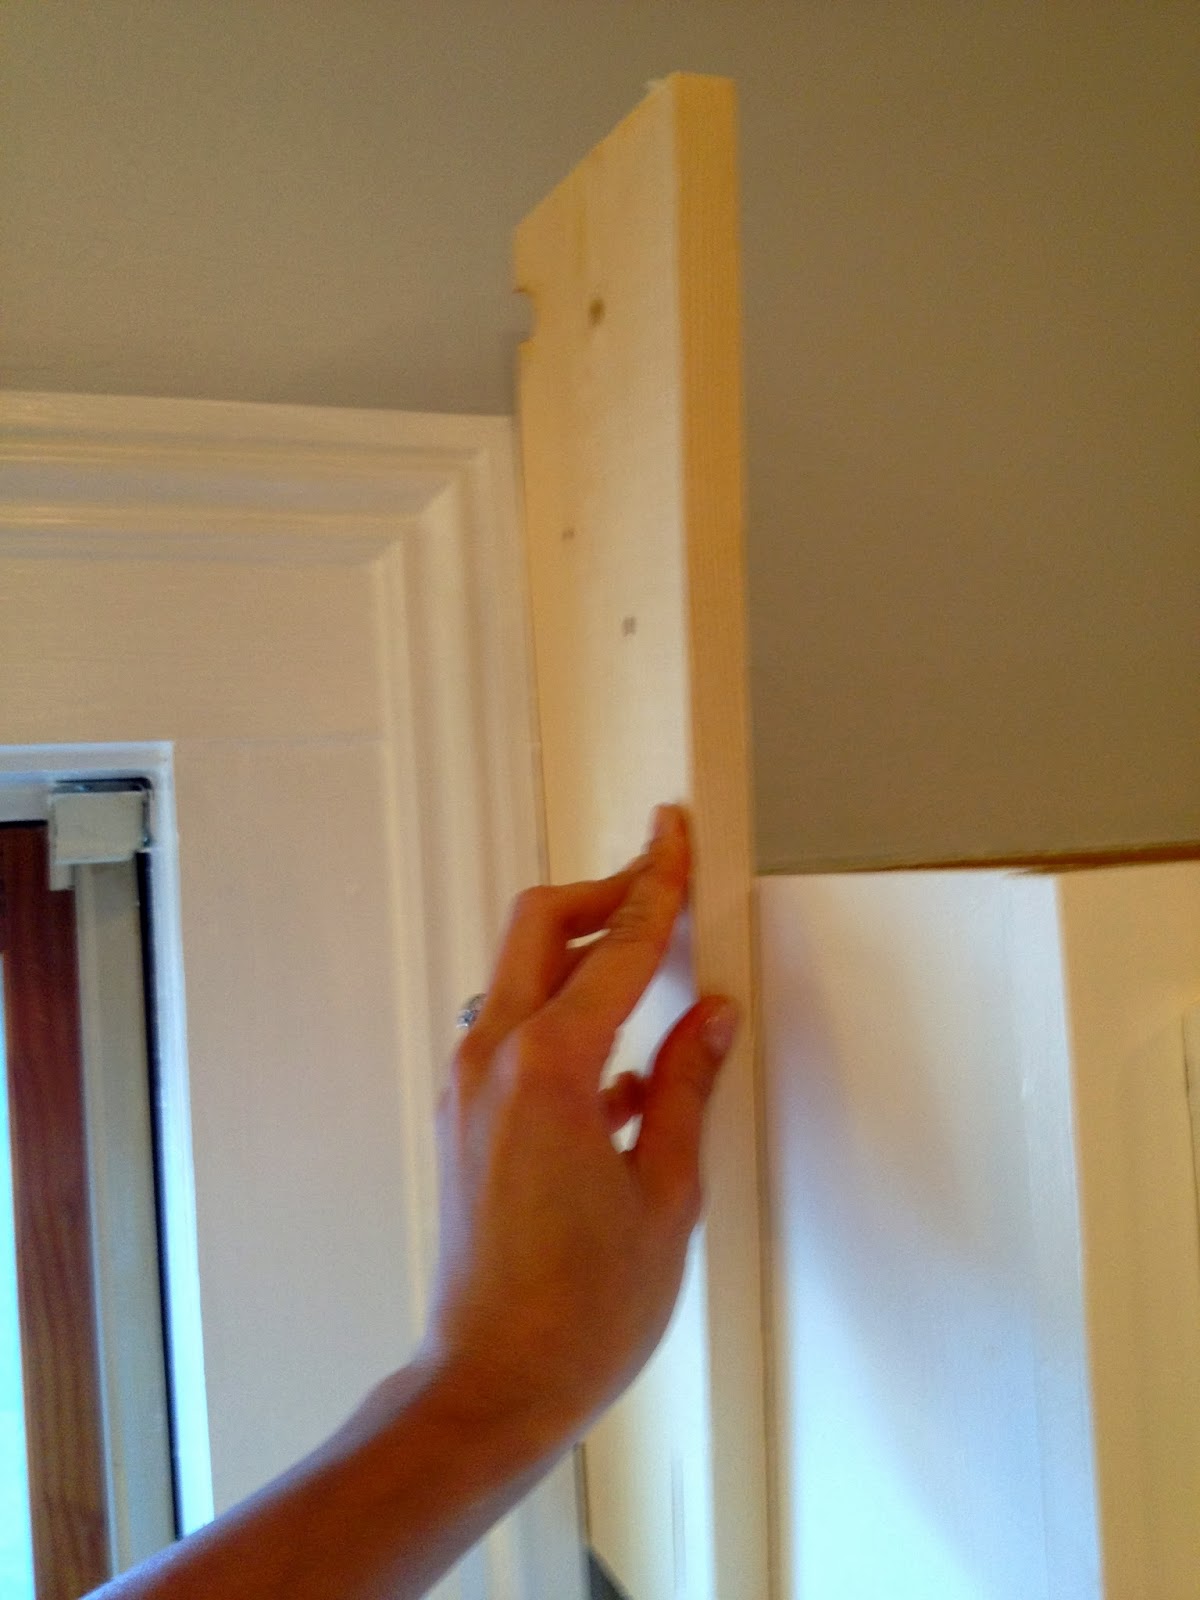
To create the wooden frame for the cornice, I picked up 6" boards from Home Depot for the top and sides and used some left over plywood sitting in my huge stack of extra wood from other projects.  While I had measured the little space between our hanging cabinets and the window frame before I left, it turned out that the 3/4" boards I bought were too thick to squeeze in there, especially with the extra batting and fabric... so I had to improvise a little and ended up making do with some more scrap plywood pieces only 1/2" thick.


After a little online research into pelmet (or cornice board) designs, I ended up choosing one with pretty simple lines but also a little notching for interest.  Why make it too easy for my first try, right? :)  Once I had chosen my layout, I cut out the shape I wanted on a piece of paper and traced it on each end to be sure the two sides would match.  Then a quick run through with the jigsaw and I was ready to assemble.  I used a finish nailer to attach the frame and the front of the cornice all together and then switched to my pneumatic staple gun before beginning the upholstery part of the project.


Once the frame was built I hung it temporarily on the window to be sure the dimensions worked proportionally with the window and that it would actually fit around everything before moving on to the upholstery.


I doubled up the batting around the frame to ensure a cushy, forgiving base for the fabric, wrapped it around the edges and stapled it in place.


Most upholstery fabrics don't come in sizes as wide as I would have needed for this window-- 77"-- so I didn't bother looking.  After browsing through plenty of fabric shops for ideas, in the end I went with a piece of taupe and robin's egg blue trellis fabric that my mom gave me a couple of years ago.  I always loved it but never had just the right use for it until now.  After carefully pinning two edges together and matching the pattern as closely as possible, I stitched it down to create one larger piece of material, wide enough to cover the whole pelmet.


The most important thing I tried to keep in mind when stapling the fabric in place was to keep the pattern straight, pulling the material taught (but not too tight, so it doesn't pucker).  Once the main body of the box was finished, I needed to attach a panel of fabric somehow to the inside sections of the side pieces, where you can see easily standing near the window.  The staple gun can't reach down far enough to the corners to create a clean look, so I used a technique I've seen before in furniture upholstery: I cut long, thin sections of sturdy cardboard and stapled them into place at the back of the side sections.  Then all I had to do was fold the edges, pull the pieces around and staple along the back where the pelmet meets the wall.


Even with this window being so wide and the extra step of pulling out the sewing machine, this whole project only took a half a day (not including my near-daily trip to Home Depot, which is just a given:)).  I'm excited to have such an easy, fun project for sprucing up windows up my sleeve, and I'm thinking some other rooms might need an update on the next rainy day! Have you ever made your own pelmets?


xo

Liza
Related Posts Plugin for WordPress, Blogger...