Showing posts with label hosting. Show all posts

Monday, April 28, 2014

Small Meals Big Punch

The Rev. and I are so excited to host our dear friend D.Roseberry for supper this evening. Now, when your regular dinner crowd consists of at least 10 hosting ONE friend feels like a breeze. 


Since we penciled dinner together a week ago, I have been thinking about what to prepare. I thought I may do something a little special in the kitchen, but then when it came down to the shopping I opted for my favorite dinner choices; roasted chicken, brussels sprouts, patatas bravas, and a little Ciao Bella for dessert. 


 Now for a little something special……

Wednesday, April 9, 2014

Summer Place Settings: Anthropologie Sale

One of my favorite things about Anthropologie is their whimsical collection of animal themed plates and table accessories that capture the imagination.  I stopped in the other day to pick up my favorite perfume from there and saw that they currently are offering a sale--15% off of their dinnerware.  Our local store had huge display of their various dishes all mixed together, which gave the whole look a fun, relaxed feel.  Perfect for summer.

I'm pretty sure these gilded bird candlesticks are not included in the sale this time, but how fun are these guys?  I love them all!

More after the jump!

Tuesday, April 8, 2014

SUPPER: PART DOS

Remember a couple weeks back I told you S made dinner. My ninos love sushi, soup dumplings, and chicken fingers. So, when it comes to dinner time they are opinionated and willing to help. When I realized how keen S was when it comes to preparing a meal, I jumped on that. I taught her to crack eggs, measure, and season. Now, I feel pretty confident she can put together a few small meals on her own that we all love. Tell me who doesn't like chicken tenders?


I do have to say our version of chicken nuggets are on the healthy side, but that is not to say they aren't delicioso. 

Wednesday, March 26, 2014

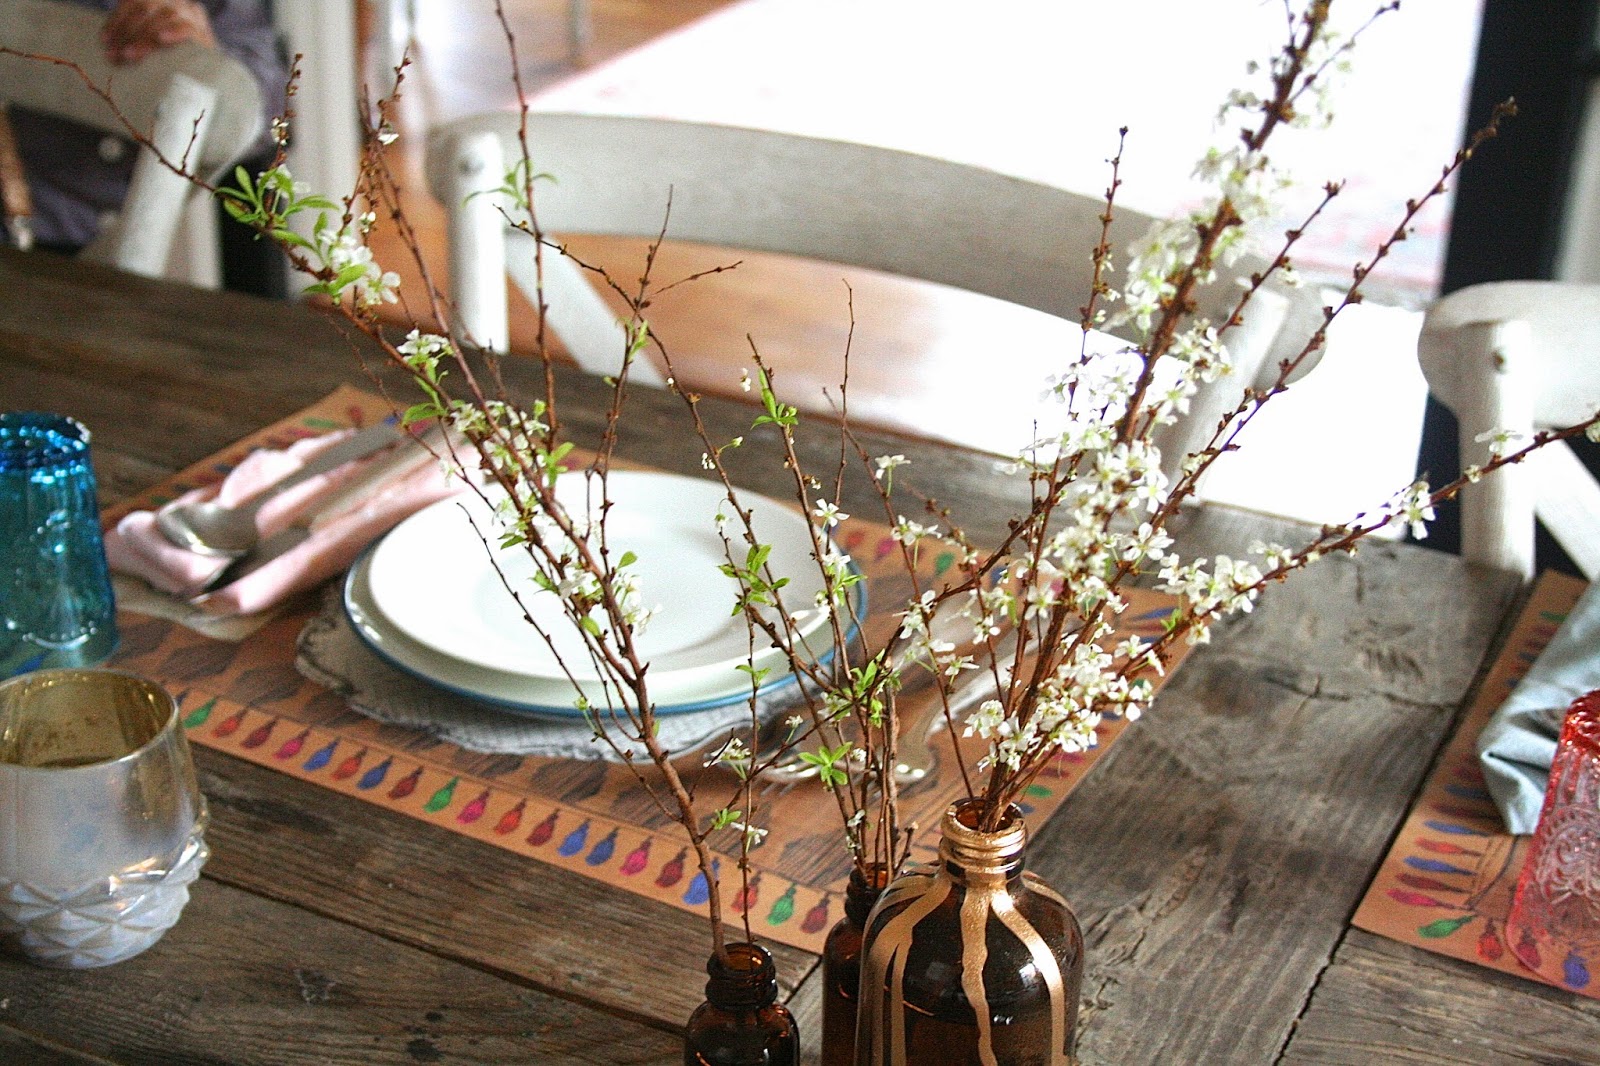
DIY: GOLDEN AMBER VASES

We are just ONE week away from The Mockingbird Conference and we cannot wait!!!  I love a party, especially one that involves pop culture, art, and God. So, when it came time to think up our decor for the conference, I wanted to work outside the box. So, instead of running towards Mason jars, I found vintage inspired Amber glass jars.  When I opened my packages I was so pleased with the shape of the jars, but found them just a little too plain. 


Naturally I took out my metallic gold paint and took it to the jars, and I was hoping for a perfectly imperfect look. 


READ MORE

Tuesday, March 25, 2014

Supper: Part UNO

My kids and I have been cooking up meals together practically since they were born. Preparing meals together is our afternoon activity, and I can honestly say is well worth the effort. I love a family meal that involves all of US, and the ninos do too. 


Like any good meal, we begin the experience at the table. Last night our family shared a meal with our dearest friends here in NYC, our neighbors. S was more then excited to host our friends and happily set the table on her own.


READ MORE

Tuesday, March 4, 2014

The Elephant Birthday Party

Hola! 
We are now on the other side of Henry's Elephant birthday party, and I am so happy to share our little elephant costume DIY today. I promise you, these costumes were simple and easy to pull together. Here is how it all went to down. 


UNO: EARS
I simply purchased a variety of brightly colored felt along with a fair amount of gray felt for our elephant ears. I bought all my felt at Michael's because you can find so many great colors, and at just 29 cents each, you really can't beat that price. I then decided to use headbands to attach our cut out felt ears to. I found a package of 6 headbands for 2.99 at Target. What a deal, and the headbands come in a variety of colors. 

We completed the ears easily on a Sunday afternoon. Simply make a template of a left and right ear, trace them and cut them out of felt. I used a hot glue to adhere each ear to a headband. For fun we created a variety of sizes, so we could have baby elephants, too. 


DOS: TRUNKS
I don't know about you but, I am loving ROVING WOOL these days, and Martha Stewart has a fabulous line of this soft, chunky wool yarn in a variety of colors. I was thrilled to find such fun yarn for our elephant trunks. RIGHT NOW, the same wool is on sale at Lion's Yarn at 1.99-- what a deal. 


TRUNK TIPS
I simply stitched alternating rows of PURL & ENGLISH stitches. My rows were between 15 to 20 stitches per spool of yarn.  Once I had knitted all of the forms, I stuffed them with batting to give more shape to our trunks. I then used a bright pink satin ribbon to tie the trunks around each child's head. The boys did not seem to mind the little punch of pink. 
 One mom pointed out the trunks could also function as tails-- what a great idea!


KIDS @ PLAY
With our trunks and ears in place our kids where ready to be transformed by my dear friend Jackie. Jackie is a fabulous children's drama instructor, yoga teacher, and actress.  The kids LOVE her and followed her lead into a imaginary elephant adventure, with a few yoga moves in play.


THE END
The kids had a fabulous time playing make-believe and running around the tents. With just some yarn, felt, a glue gun, and some tents our home was transformed. I love taking the simplest of textiles and turning them into something unexpected.


 Come back Thursday for our FULL decor reveal.


Mil Besos!


MEL

Friday, February 28, 2014

Party Preparation

Our entire week has been FULL of party preparation, my kind of week. We had a wee celebration for Henry's birthday day and now we are in full swing preparing for tomorrow's BIG fiesta. You only turn 4 once and you only get one elephant party. Here are a few sneak peeks of what is ahead of us manana. 

Friday, January 17, 2014

The Art of Hosting: Part DOS

Hello Friday!

I am so pleased to find ourselves at the end of another fabulous week.  How are your New Years resolutions coming along?  I have been so proud of the Rev. He is working hard to keep healthy this year, and we have just had a couple great weeks as a family. You know in life you have phases and weeks, and days in your relationships. Sometimes you hit a great rhythm and I feel like we are in one, which I am enjoying every minute of.


Now for the good stuff. 

Wednesday, January 15, 2014

The Art of Hosting: Part UNO

Today I am planning a dinner party for 8 on Friday. After the month of December, 8 feels so easy, but I know when it comes down to it, 8 takes almost as much prep as 50. We are planning a Taco Party, because who doesn't want to pretend they are on a beach in Mexico in the middle of January? 

Wednesday, January 8, 2014

The Best of 2013: Some of Your Favorites

2013 has been quite a year for Mel & Liza.  Between us settling into our home in Louisville (which really just means 12 months of nonstop projects) and Mel and her family moving into a gorgeous, spacious new apartment, we have had plenty to keep us busy and out of trouble.  Here's a look back at some of 2013's highlights and your favorite posts:

An IKEA Hack:  When we desperately needed more clothes storage in our bedroom, we looked to IKEA for an inexpensive, simple chest of drawers with endless possibilities for painting, staining and making it your own.  Check out the brainstorming session here as well as the before and after here.


An All Natural Guest:  Back in February, Melina posted about our friend Andrea and her fabulous, home made hand and lip balm that she cooks up in her kitchen.  More on that here.


Front Door Makeovers:  Great minds think alike! Earlier this year (while still in their old apartment), Mel whipped out her paintbrush and transformed their front door with a few coats of crisp black paint.  Inspired by her look, I followed her lead just a few months later.  Read more here and here.


Sewing a Box Pleated Bedskirt: Our bedroom is small, too small for all of our piles of clothes that don't seem to have a place in the dressers or closet.  So a while back we filled up some under bed storage containers to help solve the overflow problem, and I sewed a custom bedskirt to hide the bins and give the room a finished look.  Check out the tutorial here.


Butler's Pantry:  Mel reworked the butler's pantry in their new apartment, creating the perfect space for her gorgeous flower arranging projects.  It's a beautiful, functional room, and I would kill for a flower station!  More here.


Lindsay's Apartment:  You loved the before and after photos of Lindsay's dining room.  Thanks to a super inexpensive antique store find, her dining room table saved her hundreds of dollars and the freedom to buy the lucite chairs she'd been wanting.  A favorite calendar of scenes of NYC, cut and framed in affordable IKEA frames, and the whole place was transformed!  Read more here.


Birthday Party:  Nobody throws a party like Mel.  Seriously, she has a gift for entertaining that makes anyone of any age feel special and comfortable, and her children's parties really showcase her talents.  This fabulous birthday spread was one of your favorites- and mine, too!  More here.


Linen Closet DIY:  When we were still living in a completely chaotic house under construction, I had to get something organized to stay sane.  The upstairs linen closet got a good cleaning, new shelves and shiny new labels to keep things in their proper place.  And I got to feel like there was some hope for the rest of the house:)  More here.


Mel's Beautiful Kitchen Redo:  We love before & after posts! Don't you?  Melina transformed the kitchen in their new apartment by meticulously sanding, priming and painting her cabinets with a fresh white, instantly brightening up the room.  Check out the post and tutorial here.


The Deck:  This year we tackled the largest, most involved project we've ever attempted and built a deck off of the back of our house.  After weeks of long, hot, dirty work days, countless pieces of lumber and about a million pounds of concrete, we ended up with a party deck that has already become our favorite spot in the house.  And I must admit, I'm pretty darn proud of the two of us:)  Read more about it all here, here, here, herehere, herehere and here.


We have loved getting to share our lives and projects with you all this year! Thank you for being a part of our 2013.  We're looking forward to a great year with you all!

xo

Liza

Monday, December 9, 2013

Christmas Party Tent: Adding an Extra Room to the House


Each year we like to throw a little Christmas cocktail party at our house as early in December as possible, partly to catch everyone before their schedules fill up, and partly to get on the calendar before they're sick of Christmas parties:)  I knew we'd invited more people than in the past, so cramming them into the house could be a bit of a challenge, which is why we decided to buy this tent for the back deck to add another room to accommodate all of those extra bodies.  I was so excited when it arrived, even though it comes in three huge, super heavy boxes full of about a million parts that looked pretty intimidating at first when we opened everything up.  Actually, assembling this monster turned out to be satisfying and even quick, with the two of us working together.  But who am I kidding?  I love this kind of thing:)


Once the tent itself was in place, we got to work making the space a bit less carport-like and a little more party ready.  Jady's enthusiasm for Christmas decorating is boundless and contagious in the happiest way, and I'm always grateful for his tireless efforts when it comes to hanging lights and schlepping trees around.  I picked up some extra long strands of white lights, which we hung all around the sides and top of the tent.  Then, to soften the look of the lovely vinyl and metal construction, I brought home 20 yards of inexpensive white muslin fabric and hung that over the lights on the ceiling.  The fabric turned out to be such simple addition, and I was really pleased with the difference in the feel of the space.

For this year's party I decided to go super simple with the tree and barely hung any ornaments at all-- and while I'd like to claim it as a minimalist design decision, it actually just knew I wouldn't have time to fuss over it and bumped decorating the tree way down on the priority list.  Better to have a bare tree than hungry guests, right?  I think I made the right choice.


The night of our party the weather turned out to be terrible-- as in heavy snow and icy roads that stranded a bunch of our friends on back roads and up steep driveways.  But tons of people risked life and limb to come party with us anyway!  The day before, to help cozy up the deck area and to try to keep the freezing air out a bit, we laid out some carpet remnant and an extra couple of rugs I had stashed away.  The electric heaters were a critical addition, given the weather, and I have a feeling we're going to use them a ton between now and summertime.

Sadly, with all of this effort and party prepping, I am the WORST at remembering to take pictures of the actual event!  Ugh.  This one is literally one of two photos I snapped at the very beginning of the night.  I seriously need a personal assistant:)


xo

Liza


Tuesday, November 26, 2013

Party Deck in Freezing Temperatures

I can't believe that Thanksgiving is in only two days!  We are going to be with my family for a few days this week, which I'm so excited about.  During all of those years in Europe we came home a lot to visit, but this is the first major holiday we have celebrated together with my whole family in years.

 It just hit me, though, that if Thanksgiving is here already, that also means that December is right around the corner!  In just a couple of weeks we'll be hosting a Christmas party at our house, so the minute the Turkey is eaten and we all say goodbye, it's time for me to get in gear and prepare for this Christmas crowd.

I'm expecting this year's party to be pretty big, and while our house can handle a decent number of people, I kept thinking how much better it would be if we could spill out onto the deck like we could in the warmer months.  Which, of course, led to some serious online research into how to make that possible.  It occurred to me: why not use a tent on the deck and incorporate the space into the house for the party?  

After digging around and comparing prices to rent a tent for the night, I quickly realized that buying one is much more economical, especially since we'll be able to use it in the future, either on the deck or in the yard.  (Yes, my husband thinks I'm a little crazy at this point.)  There are some crazy cheap options out there if you are flexible on size, but I wanted the dimensions of the tent to fill the area of the deck as closely as possible to maximize the space, so I ended up paying a little more.  Still, this beast, which covers 13' x 26' only cost me $349, new with free shipping from eBay.


Since the weather here will most definitely be freezing the night of the party, I immediately thought of using space heaters like at wedding receptions under tents (again, I know I sound insane:)).  Unless you keep the sides open for the air to circulate, you can't use propane heaters, but electric ones will do the job in an enclosed tent like ours will be.  A local place here will rent them for $60 a night per heater, but I found these on eBay new for $77 each including shipping, and an extra $17 per heater to own them and use them again seemed totally worth it.


Everything arrived last week, so now all we have to do is assemble it all (yikes)!  I'm so excited about adding a whole "room" to the house for this party, and I'll be sure to post an update on how everything turned out.


xo 

Liza
Related Posts Plugin for WordPress, Blogger...